


Ghanaian Rice Balls Omo Tuo Recipe
Ingredients
- 2 cups jasmine rice (or any short/medium grain rice)
- 4 cups water (for cooking)
- ½ teaspoon salt (optional)
- Extra water (as needed during cooking)
Directions
Step 1 : Selecting the Right Rice for Omo Tuo
Choosing the correct type of rice is essential for achieving the soft, sticky consistency needed for perfect Ghanaian rice balls. Short-grain or jasmine rice works best because it becomes tender and slightly sticky when cooked. Avoid long-grain rice like basmati, as it does not mash well. Carefully measure two cups of rice and inspect for stones or debris, removing any impurities before washing. Using quality rice ensures a smoother texture and better binding when forming the balls. This foundational step determines the success of your dish, so take your time selecting the best rice available.
Step 2 : Washing the Rice Thoroughly
Place the measured rice into a bowl and rinse it under clean running water. Gently swirl the rice with your fingers to remove excess starch and impurities. Drain the water and repeat this process two to three times until the water runs clearer. Washing the rice properly helps prevent it from becoming overly gummy while still maintaining enough starch for binding. This balance is key to achieving the ideal texture for Omo Tuo. Clean rice also enhances the final taste, ensuring your dish is fresh, hygienic, and ready for cooking.
Step 3 : Measuring and Preparing Cooking Water
Accurate water measurement is crucial for soft and well-cooked rice balls. Add four cups of water to a cooking pot for the two cups of rice. This ratio allows the rice to cook thoroughly and become soft enough for mashing later. You may also add a pinch of salt at this stage if desired, although traditional recipes often skip it. Place the pot on medium heat and bring the water to a gentle boil before adding the rice. Proper water preparation ensures even cooking and prevents undercooked or overly dry rice.
Step 4 : Cooking the Rice to Soft Perfection
Once the water begins to boil, add the washed rice and stir gently to distribute it evenly. Cover the pot partially and allow the rice to cook on medium heat. Stir occasionally to prevent sticking at the bottom. As the rice absorbs water, check its softness by pressing a grain between your fingers. The goal is to cook the rice until it becomes very soft and slightly mushy, not firm. If needed, add small amounts of water during cooking to maintain moisture. This step is vital for achieving the smooth consistency required for Omo Tuo.
Step 5 : Monitoring Moisture Levels During Cooking
As the rice continues to cook, it is important to monitor the moisture level closely. If the water dries out before the rice becomes soft, add a small amount of hot water and continue cooking. Avoid adding too much water at once, as this can make the rice overly watery and difficult to mash later. Stir gently to maintain even cooking and prevent burning. Proper moisture control ensures the rice remains soft, pliable, and easy to work with when forming the balls, which is essential for achieving authentic Ghanaian texture.
Step 6 : Mashing the Cooked Rice Smoothly
Once the rice is fully cooked and soft, reduce the heat to low and begin mashing it directly in the pot. Use a sturdy wooden spoon or ladle to press and stir the rice repeatedly. This process breaks down the grains and transforms them into a smooth, sticky mass. Continue mashing until the rice becomes uniform without visible grains. This step requires patience and consistent effort, as proper mashing is what gives Omo Tuo its signature soft and cohesive texture that holds together when shaped.
Step 7 : Achieving the Perfect Sticky Consistency
After mashing, assess the texture of the rice. It should be soft, stretchy, and slightly sticky without being watery. If the mixture feels too dry, add a small amount of hot water and continue mixing until the desired consistency is reached. If it is too wet, allow it to cook uncovered for a few more minutes to evaporate excess moisture. The right balance ensures the rice can be shaped easily without falling apart. This step is crucial in achieving authentic Ghanaian rice balls that are smooth and cohesive.
Step 8 : Preparing to Shape the Rice Balls
Before shaping the rice, prepare a small bowl of water. This will be used to wet your hands or utensils to prevent sticking. Scoop portions of the mashed rice using a ladle or cup. Working while the rice is still warm makes shaping easier and more effective. Ensure your hands or shaping tools are slightly wet to maintain a smooth surface. Proper preparation at this stage ensures that the rice balls will have a neat, round appearance and a soft texture that is visually appealing and traditional.
Step 9 : Shaping the Rice into Balls
Take a portion of the mashed rice and gently roll or mold it into a round ball using your hands or by rotating it in a bowl. Apply light pressure to create a smooth, compact shape without cracks. Repeat this process until all the rice is shaped into evenly sized balls. Consistency in size helps with presentation and serving. This step defines the final look of Omo Tuo, making it visually appealing and ready to be paired with delicious Ghanaian soups.
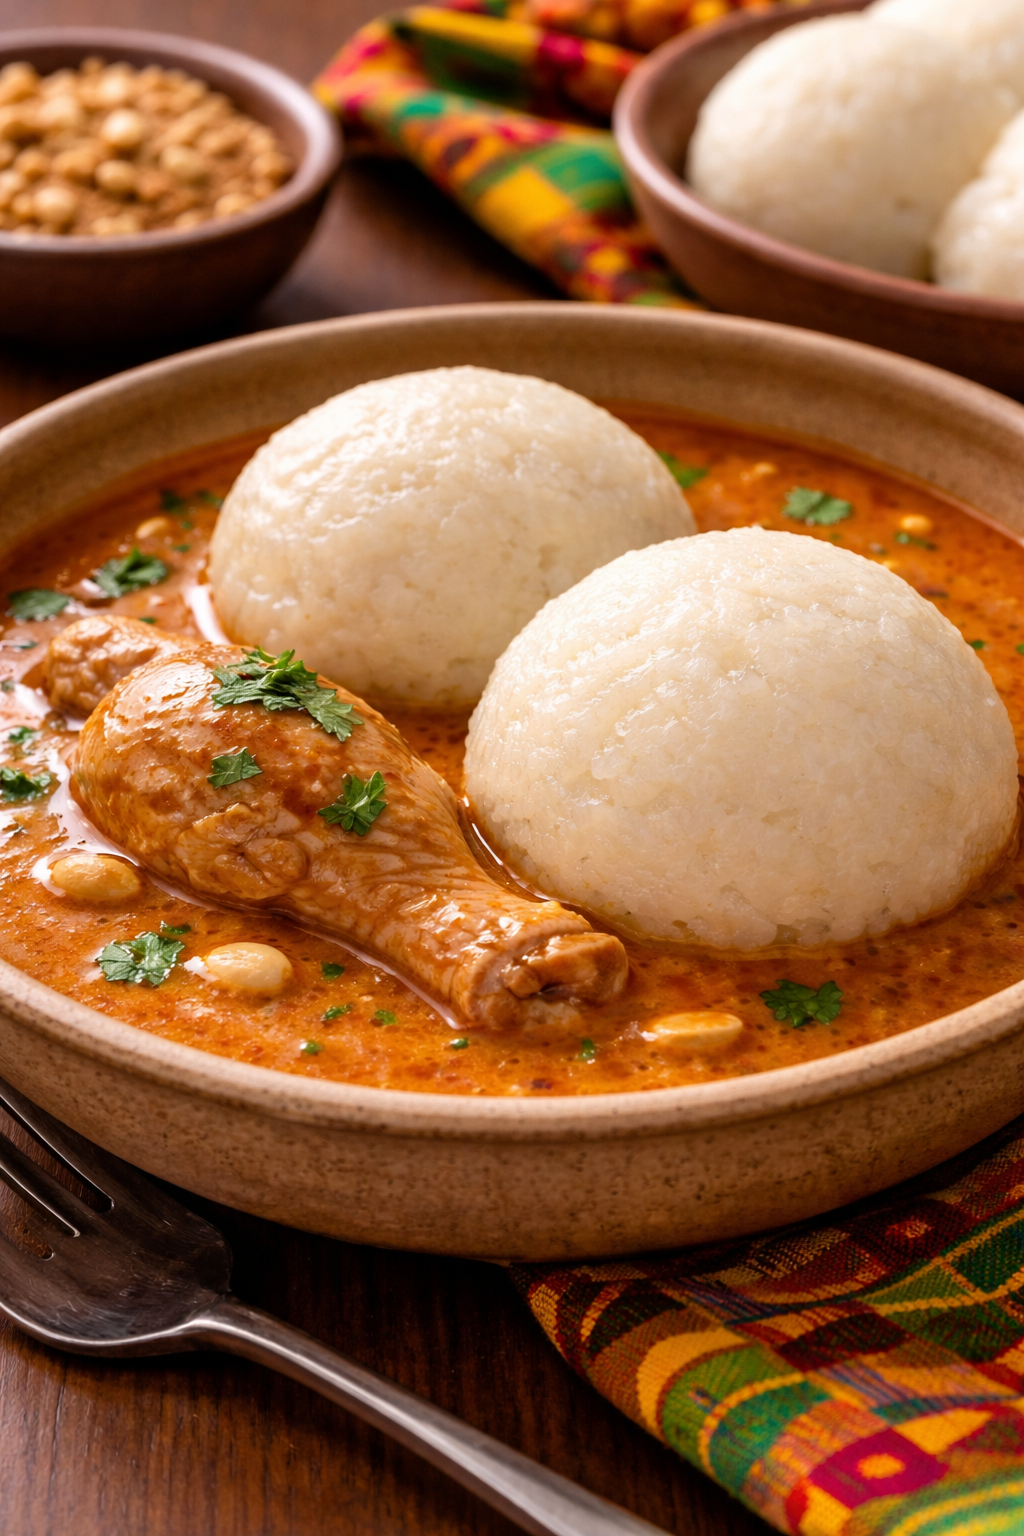
Step 10 : Serving the Omo Tuo Traditionally
Serve the rice balls warm in a bowl alongside your preferred Ghanaian soup such as groundnut soup, palm nut soup, or light soup. Place one or two rice balls in each serving bowl and pour the soup around them. Traditionally, Omo Tuo is eaten by breaking off small portions and dipping them into the soup. The soft texture allows it to absorb flavors beautifully. This final step completes the dish, transforming simple ingredients into a comforting and authentic Ghanaian meal enjoyed by many.